
Map user attributes to IdP
Learn how to add and map custom user attributes, such as an employee number, from an Identity Provider (IdP) like Okta using Scalekit.
Scalekit simplifies Single Sign-On (SSO) by managing user information between Identity Providers (IdPs) and B2B applications. The IdPs provide standard user properties, such as email and firstname, to your application, thus helping recognize the user.
Consider a scenario where you want to get the employee number of the user logging into the application. This guide demonstrates how to add your own custom attribute (such as employee_number) and map its value from the Identity Provider.
Broadly, we’ll go through two steps:
- Create a new attribute in Scalekit
- Set up the value that the Identity Provider should relay to this attribute
Create a new attribute
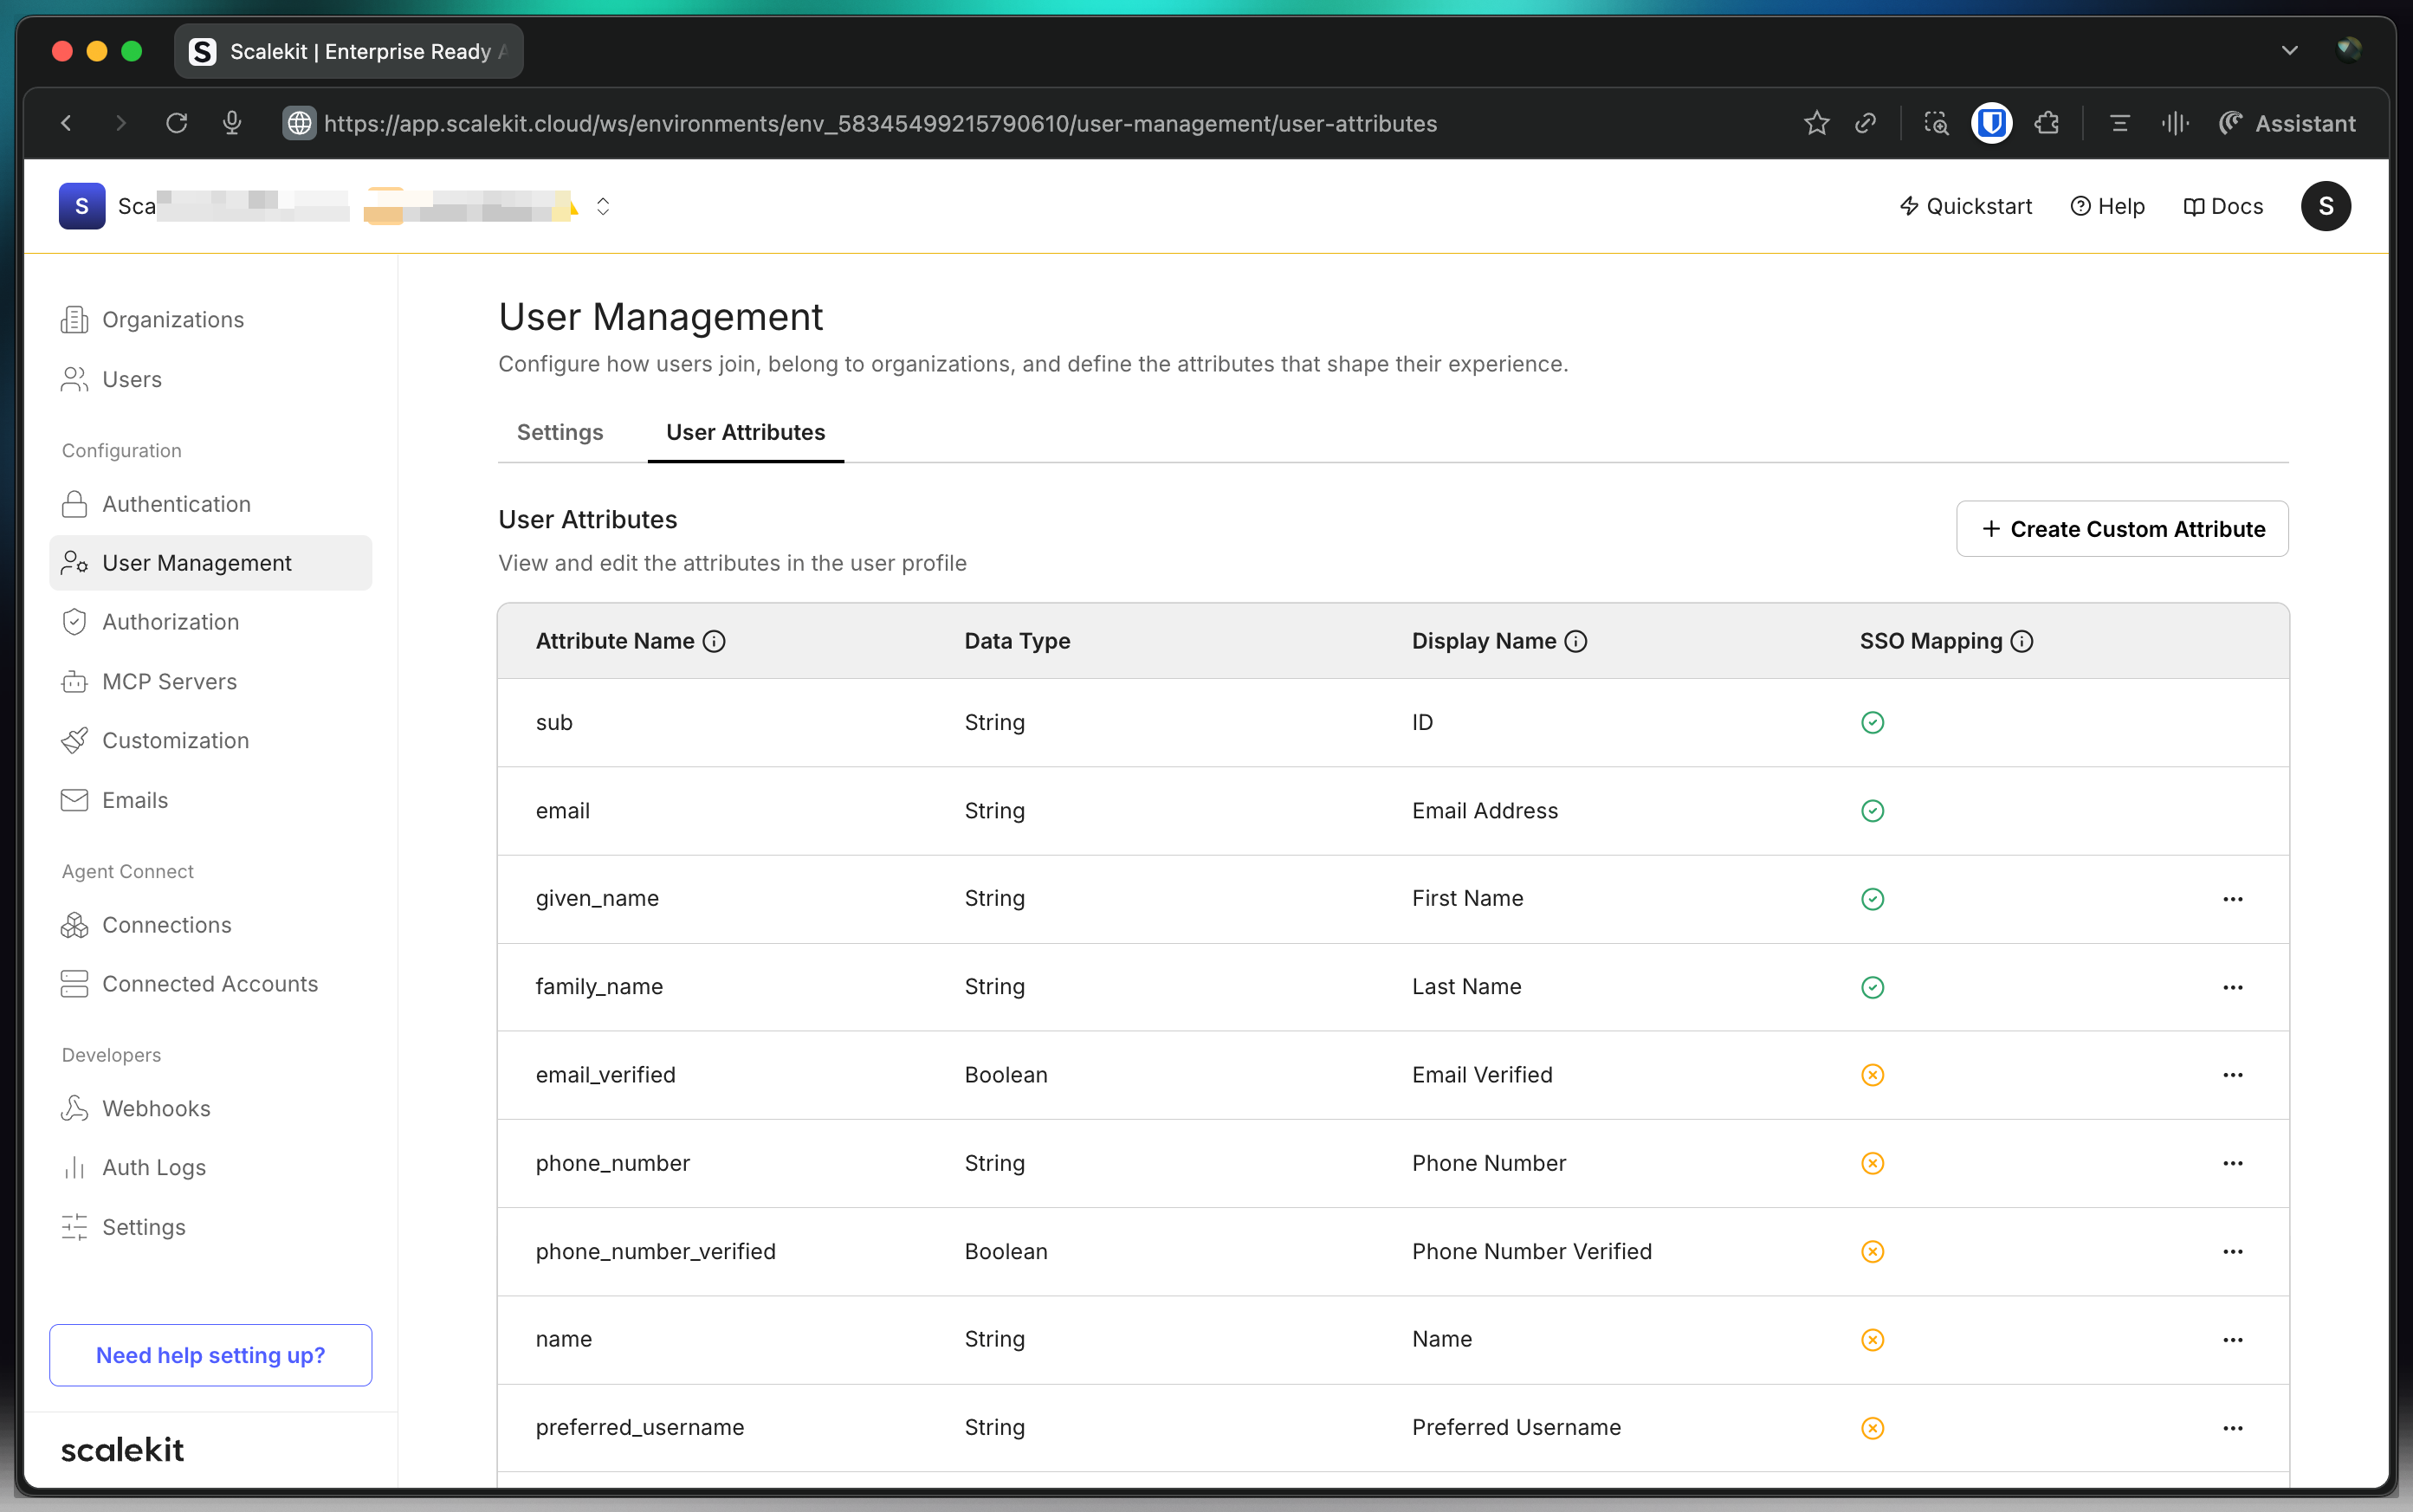
Section titled “Create a new attribute”Let’s begin by signing into the Scalekit dashboard:
- Navigate to Dashboard > SSO > User Attributes
- Click Add Attribute
- Add “Employee Number” as Display name

You’ll now notice “Employee Number” in the list of user attributes. Scalekit is now ready to receive this attribute from your customers’ Identity Providers (IdPs).
Set up IdP attributes Okta example
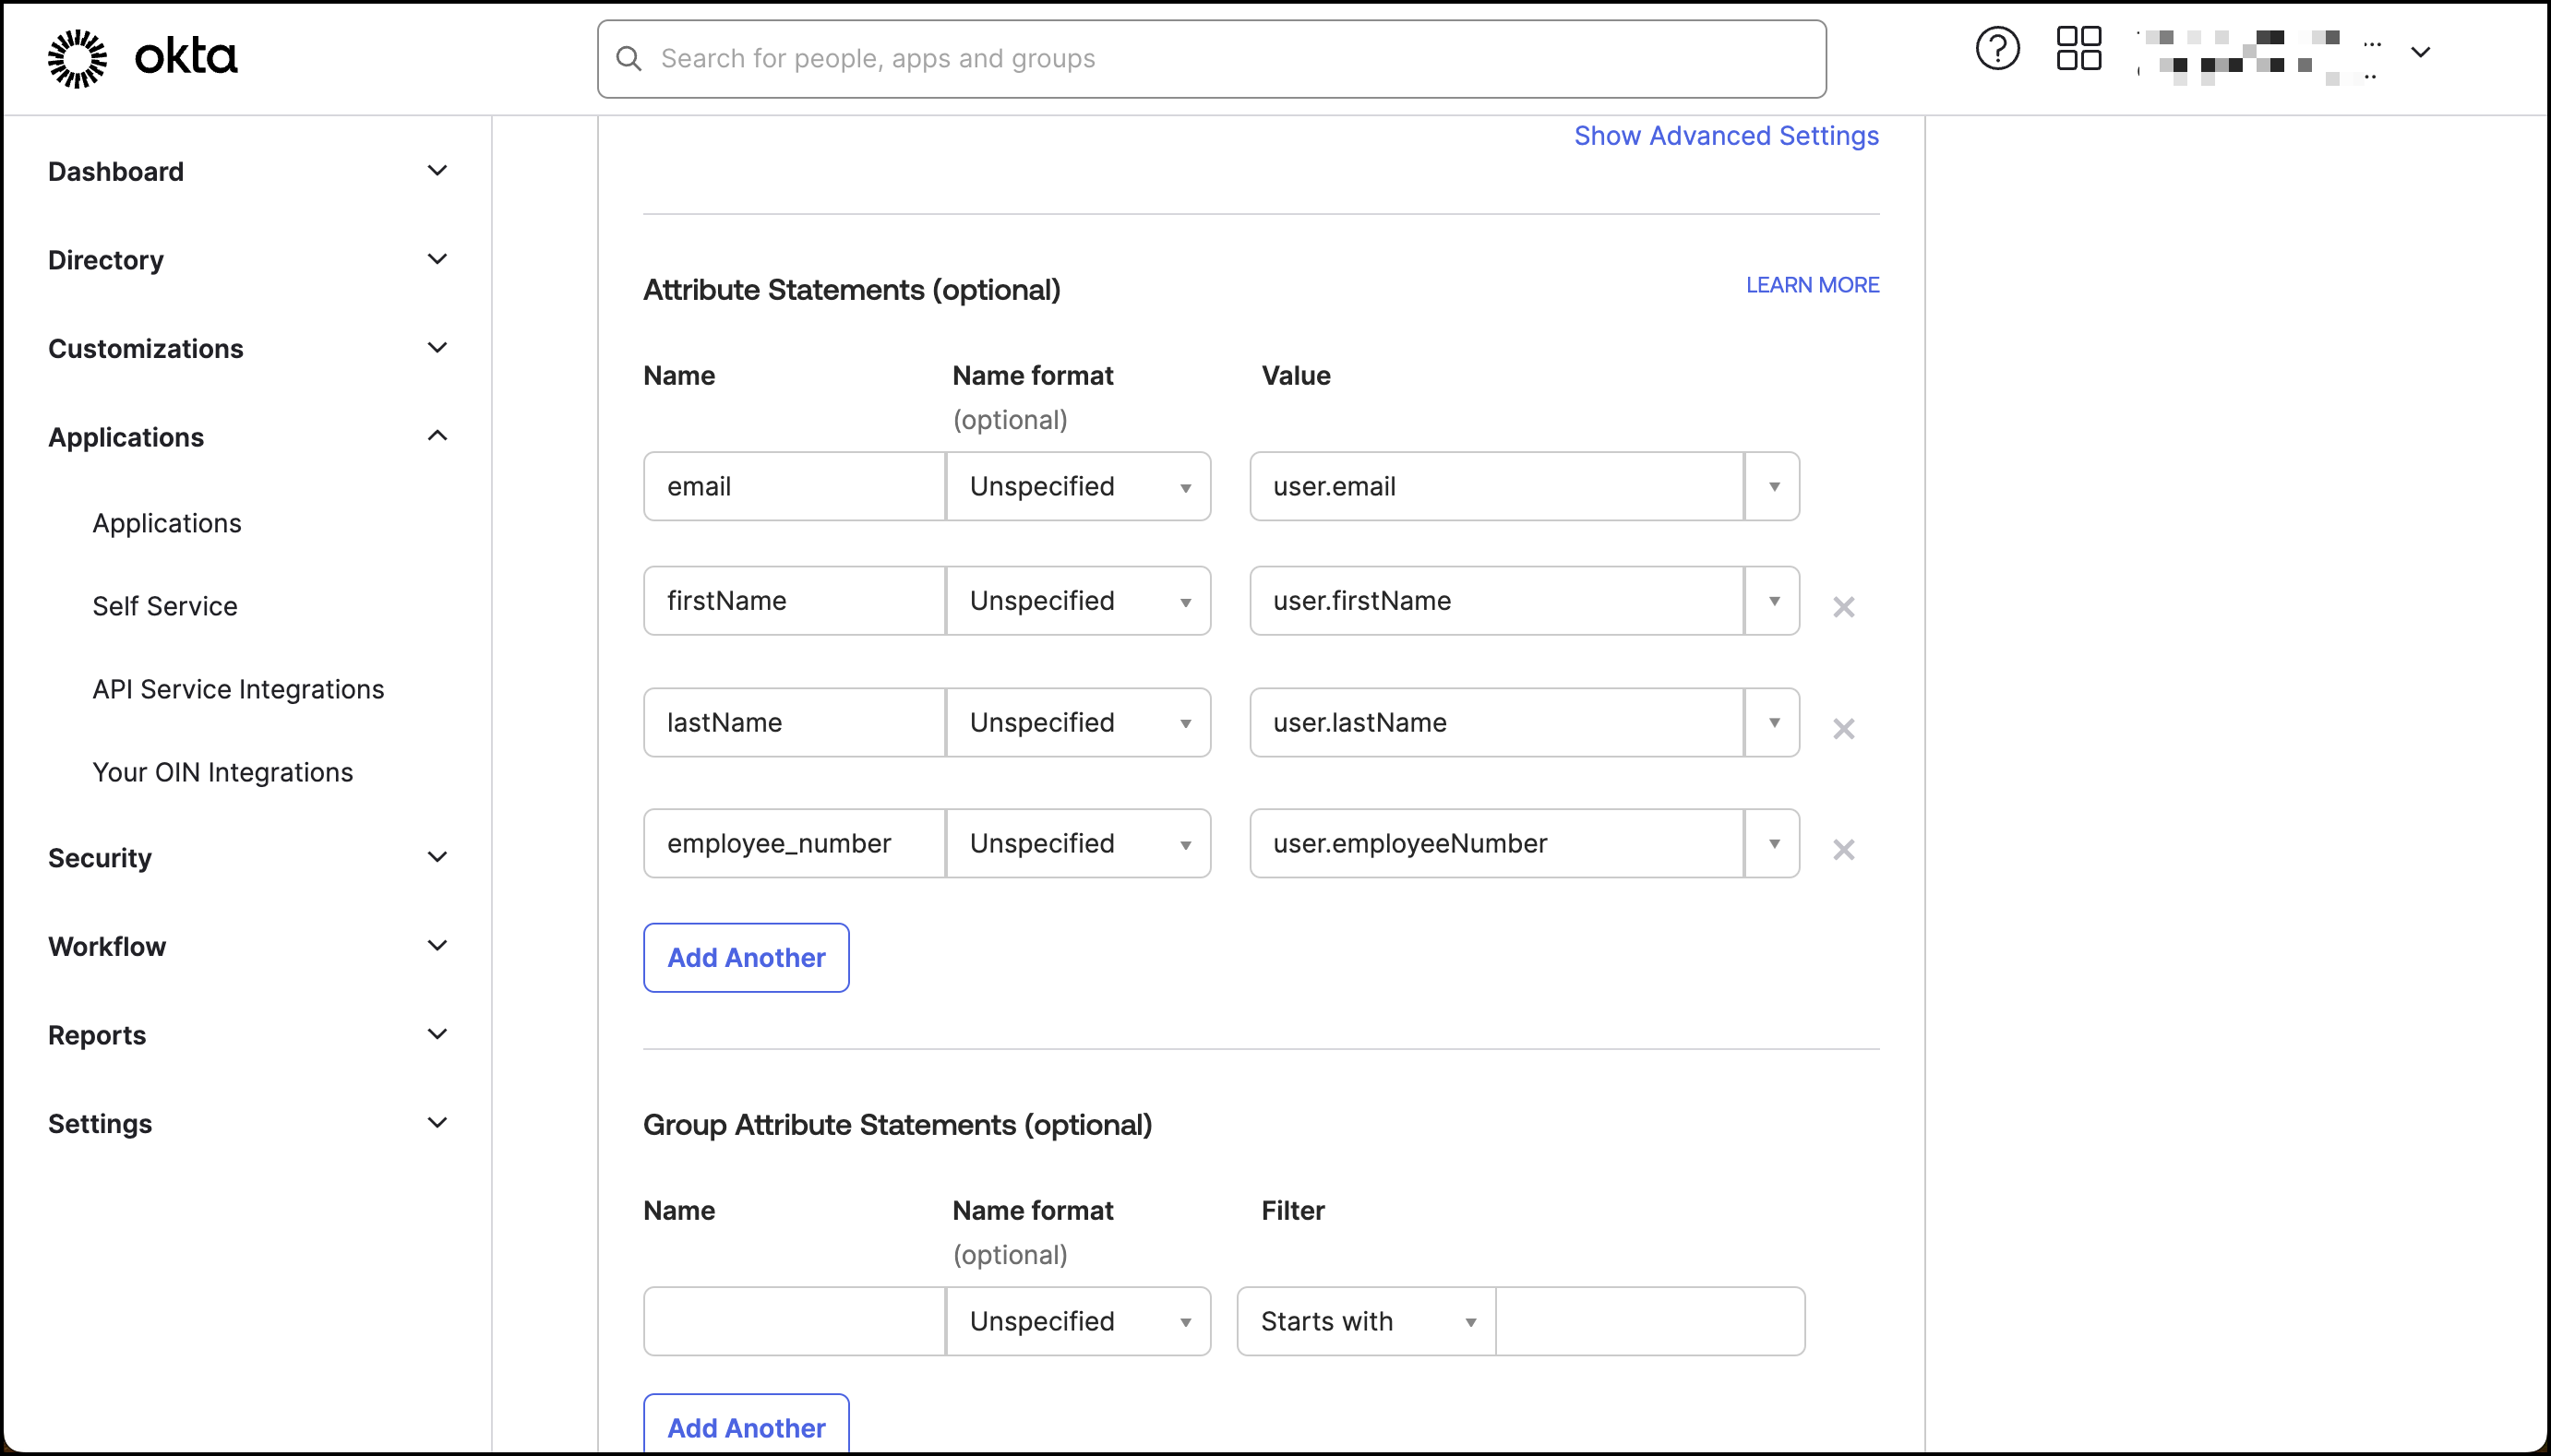
Section titled “Set up IdP attributes ”Now, we’ll set up an Identity Provider to send these details. For the purposes of this guide, we’ll use Okta as IdP to send the employee_number to Scalekit. However, similar functionality can be achieved using any other IdP.
Note that in this specific Okta instance, the “Employee Number” is a default attribute that hasn’t been utilized yet. Before you proceed forward, it’s important to modify the profile’s employee_number attribute with any desired number for this example (for example, 1729). For a detailed guide on how to achieve this, consult Okta’s dedicated help article on updating profile attributes.
Alternatively, you can add a new custom attribute in the Okta Profile Editor.
Test SSO for new attributes
Section titled “Test SSO for new attributes”In the Scalekit dashboard, navigate to Dashboard > Organizations.
- Select the organization that you’d like to add custom attribute to
- Navigate to the SSO Connection
- Click Test Connection - you’ll find this if the IdP has already been established
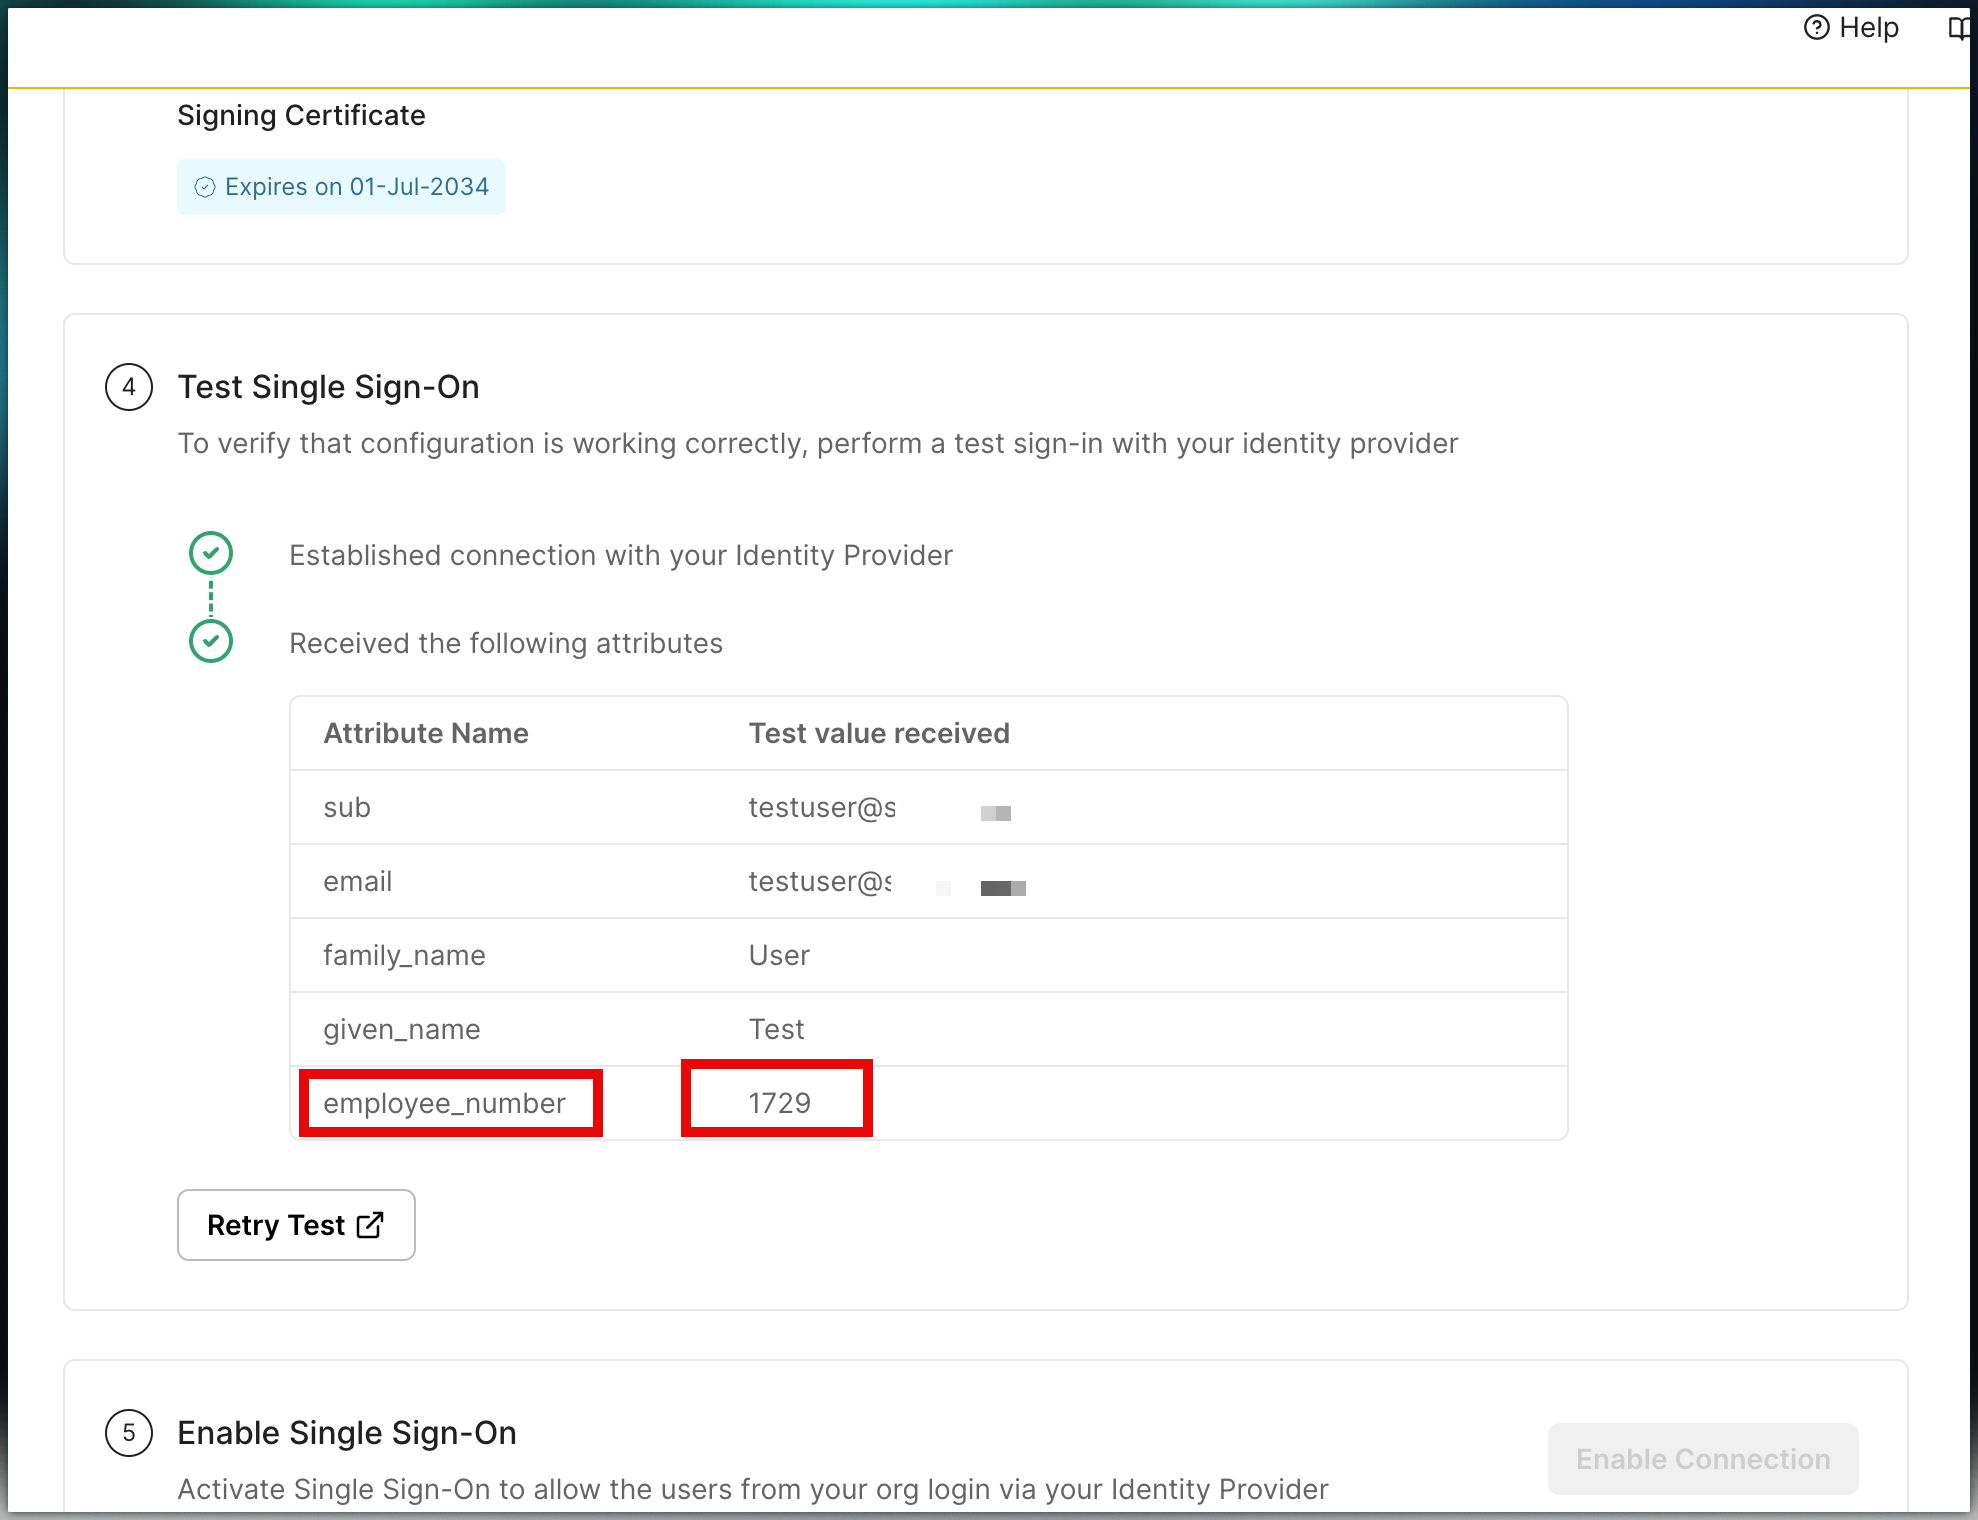
Upon testing the connection, if you notice the updated user profile (employee_number as 1729 in this example), this signifies a successful test.
Subsequently, these details will be integrated into your B2B application through Scalekit. This ensures seamless recognition and handling of customer user attributes during the SSO authentication process.
Reserved attribute names
Section titled “Reserved attribute names”Some attribute names are reserved by Scalekit and must not be used for custom attributes. Using a reserved name causes silent failures — the custom attribute value is silently dropped or overwritten during SSO.
| Name | Purpose |
|---|---|
roles | Used by Scalekit for FSA role-based access control (RBAC) |
permissions | Used by Scalekit for FSA permissions |
email | Standard claim — always populated from IdP |
email_verified | Standard claim |
name, given_name, family_name | Standard profile claims |
sub, oid, sid | Internal Scalekit identifiers |
If your IdP sends an attribute named roles, it will not appear as a custom attribute in the JWT. Instead, rename it to something unique (e.g., user_role or idp_roles) in both Scalekit and your IdP attribute mapping.
Access custom attributes from the ID token
Section titled “Access custom attributes from the ID token”After configuring a custom attribute in Scalekit, its value appears in the ID token as a JWT claim. Use the Scalekit SDK to validate the token and read the claim:
import type { IdTokenClaim } from '@scalekit-sdk/node';
// Validate the ID token and cast to include your custom attributesconst claims = await scalekit.validateToken<IdTokenClaim & Record<string, unknown>>(idToken);const employeeNumber = claims['employee_number'];const userRole = claims['user_role']; // use 'user_role', not 'roles'# Validate the ID token — returns a dict of all claimsclaims = scalekit_client.validate_token(id_token)employee_number = claims.get('employee_number')user_role = claims.get('user_role') # use 'user_role', not 'roles'// Validate the ID token — returns a map of all claimsclaims, err := scalekitClient.ValidateToken(ctx, idToken)if err != nil { log.Fatal(err)}employeeNumber := claims["employee_number"]userRole := claims["user_role"] // use "user_role", not "roles"import java.util.Map;
// Validate the ID token — returns a map of all claimsMap<String, Object> claims = scalekitClient.authentication().validateToken(idToken);Object employeeNumber = claims.get("employee_number");Object userRole = claims.get("user_role"); // use "user_role", not "roles"